Let Us Know How We Can Help. We Are Your Dedicated Solutions Provider.

When an exhaust fan stops working, the room can change quickly. Steam clouds the mirror. Odors linger. Moisture settles on walls and ceilings. A noisy fan may seem like a minor inconvenience, but it can signal a loose part, worn bearing, blocked duct, or failing motor.
Michael Turner, a ventilation engineer with more than fifteen years of field experience, says, “A strange fan noise is often an early warning, not just an annoyance.” His advice reflects a practical truth. Small ventilation problems can become expensive when ignored. The phrase Exhaust Fan Exhaust Fan may sound repetitive, but the equipment itself deserves careful attention, especially in bathrooms, kitchens, workshops, and commercial spaces.
This guide examines why an exhaust fan becomes silent, weak, rattling, buzzing, or unusually loud. It considers simple causes, including tripped breakers, dirty grilles, stuck shutters, and loose mounting screws. It also discusses airflow restrictions and motor problems that require professional assessment. Turn off the power before inspecting anything. Do not assume a clean cover means a healthy system. That assumption can be wrong.
Some symptoms overlap. A humming motor may suggest a capacitor issue, while poor airflow may come from a blocked duct. Diagnosis is not always obvious. My own first impression can be misleading when a fan sounds normal but moves little air. Careful observation matters. So does knowing when to stop troubleshooting and contact a qualified technician.
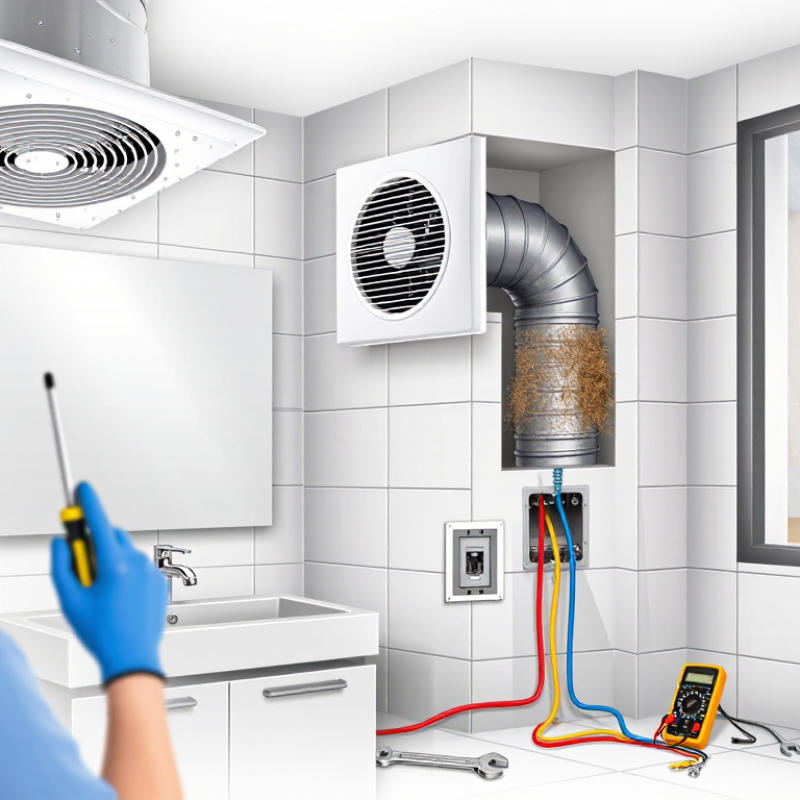
Why Is My Exhaust Fan Not Working or Noisy?
Common Reasons an Exhaust Fan Stops Working or Makes Noise
An exhaust fan may stop because power is not reaching the motor. Check the wall switch, circuit breaker, and nearby wiring. Turn off the breaker before removing the cover. A loose connection can cause intermittent operation, which is easy to mistake for motor failure. The fan may also shut down after overheating. Let it cool completely before testing it again.
Dust and grease often collect around the grille and fan blades. This buildup restricts airflow and makes the motor work harder. Clean the grille with a soft brush and vacuum the housing carefully. Never spray liquid into the motor. If the fan hums but the blades barely move, worn bearings or a failing capacitor may be responsible. Professional testing is safer than guessing.
Rattling usually points to a loose screw, grille, blade, or duct connection. I have seen a small loose grille create a surprisingly loud vibration. A scraping sound can indicate a bent blade or damaged bearing. Whistling may come from a blocked duct or a stuck exterior damper. Check the duct opening for lint, nesting material, or heavy debris, but avoid climbing onto unsafe roofs. Not every noise means the fan needs replacement. Still, repeated humming, burning smells, moisture near wiring, or a breaker that trips again requires a qualified electrician.
ASHRAE 62.2 provides minimum local exhaust airflow targets for bathrooms, toilet rooms, and utility rooms. If measured airflow is well below the applicable target, check the power supply, switch, filter, grille, duct blockage, backdraft damper, and fan motor. Rattling or grinding noises commonly indicate loose parts, debris, duct vibration, or worn motor bearings.
Reference: ASHRAE Standard 62.2 local exhaust airflow rates. Airflow is measured in cubic feet per minute (CFM).
A dead exhaust fan can have a simple cause, but the symptom needs careful identification. Turn off the wall switch, then check whether the circuit breaker has tripped. Do not open the housing while power is connected. If the switch works but the fan stays silent, inspect the grille for dust buildup and confirm the motor receives power. A qualified electrician should test wiring problems.
Noise usually points to a different fault. A light rattle may come from a loose grille, mounting screw, or backdraft damper. A scraping sound can indicate that the blade touches the housing. Grinding or humming often suggests worn bearings, a strained motor, or restricted airflow. Check the exterior vent for leaves, lint, or a stuck flap. The duct may also be crushed behind the ceiling. Small details matter.
The diagnosis is not always clean. A fan can sound normal with the grille removed, then become noisy after reassembly. That may reveal vibration or poor alignment rather than motor failure. Moisture around the housing deserves attention because it can signal condensation or a blocked duct. Avoid spraying lubricant into an enclosed motor unless the service instructions specifically allow it. If the fan smells hot, trips the breaker repeatedly, or shows damaged wiring, stop testing and arrange professional inspection. Some faults look minor at first.
Why Is My Exhaust Fan Not Working or Noisy?
Start with the power supply. Check whether the circuit breaker has tripped. A wall switch may also control the fan separately from the light. Turn the switch on and listen closely. No sound often indicates a power or control problem. A faint hum may suggest restricted movement or a loose electrical connection. Turn off the breaker before removing the cover. Never rely only on the wall switch. Use a suitable voltage tester, if you know how to use one safely.
Inspect the wiring for loose terminals, dark marks, melted insulation, or moisture. Connections should be tight and protected inside an approved electrical box. Do not touch exposed wires while power is connected. If the fan works intermittently, the switch, timer, or internal connection may be failing. A noisy fan can also have dust on its grille, a loose cover, or a worn motor bearing. Clean the grille gently and check that the mounting screws are secure. I have seen people replace the motor too quickly. The real fault was often a loose control connection.
Tips: Record what happens at each switch position. Check whether the light and fan fail together. Keep fingers away from moving parts. If the breaker trips again, stop resetting it. That matters. Contact a qualified electrician for live-circuit testing or damaged wiring. An incomplete check can miss a hidden fault.
Why Is My Exhaust Fan Not Working or Noisy?
Before inspecting an exhaust fan, switch off the circuit breaker and confirm that no power reaches the unit. Remove the grille carefully, since trapped dust often hides loose screws or broken clips. Check the switch, wiring connections, and housing for scorch marks or melted insulation. Do not touch exposed wires without proper training. A qualified electrician should handle electrical faults.
Clean the grille with warm soapy water and vacuum the dust around the motor. Use a soft brush on the fan blades. Avoid forcing debris deeper into the duct. Spin the blade gently by hand after disconnecting power. It should move smoothly without scraping. Rattling usually points to loose mounting screws, a displaced grille, or a damaged blade. A humming motor with no rotation may indicate a failed capacitor or worn bearings.
Inspect the duct outlet from outside, if accessible. Bird nests, lint, or crushed flexible ducting can reduce airflow and strain the motor. I once blamed the motor, but a blocked duct caused the real problem. That mistake was expensive. Tighten suitable fasteners, replace cracked blades, and lubricate only motors designed for lubrication. Sealed bearings usually require replacement, not oil. After reassembly, restore power and listen for vibration. Hold a thin tissue near the grille; steady movement suggests usable airflow, though it is not a professional airflow measurement. If the fan still overheats, trips the breaker, or smells burnt, stop testing and arrange qualified service.
| Observed Symptom | Likely Cause | Inspection Steps | Recommended Action | Typical Tools | Difficulty | Safety Note |
|---|---|---|---|---|---|---|
| Fan does not start | No power, a tripped circuit breaker, faulty switch, loose connection, or failed motor | Check the wall switch and circuit breaker. If safe and qualified, verify power at the fan connection with an approved tester. | Reset the breaker once if it has tripped. Tighten accessible connections only after isolation. Replace the switch or motor if defective. | Flashlight, non-contact voltage tester, screwdriver, multimeter for qualified users | Medium to High | Turn off power at the breaker before removing the cover. Do not work on live wiring unless properly qualified. |
| Fan runs slowly or airflow is weak | Dust buildup, blocked grille, clogged duct, closed exterior flap, or a worn motor | Inspect the grille, fan blades, duct entrance, and exterior outlet. Check whether the blades rotate freely by hand with power disconnected. | Clean the grille and housing, remove accessible obstructions, and confirm that the exterior damper opens. Replace a worn motor when cleaning does not restore speed. | Vacuum, soft brush, microfiber cloth, mild detergent, screwdriver | Low to Medium | Do not insert tools into the fan while it is connected to power. |
| Loud rattling or vibration | Loose grille, mounting screw, fan blade, housing, or duct connection | Switch off power and gently check the grille, mounting points, blade assembly, and nearby ductwork for movement. | Tighten loose fasteners, reseat the grille, and replace a cracked or distorted blade. Repair or support loose ductwork. | Screwdriver, adjustable wrench, replacement fasteners, duct tape or approved sealant | Low to Medium | Do not operate the fan if a blade is broken or visibly unbalanced. |
| Grinding or squealing sound | Dry or worn motor bearings, a rubbing blade, or a damaged motor shaft | With power isolated, rotate the blade by hand and listen for scraping. Check whether the blade contacts the housing or feels rough. | Remove debris and correct minor blade contact. Replace the motor or fan assembly if the bearings or shaft are worn. | Flashlight, screwdriver, soft brush, replacement motor if required | Medium | Do not apply lubricant unless the fan manufacturer specifically permits it; unsuitable oil can damage the motor or attract dust. |
| Humming sound with little or no rotation | Obstructed blade, failed starting component, seized bearings, or a defective motor | Disconnect power, check for physical obstruction, and test whether the blade turns freely. Persistent humming indicates an electrical or motor fault. | Clear debris if present. Stop using the fan and arrange motor or component replacement if the humming continues. | Screwdriver, flashlight, vacuum, multimeter for qualified users | Medium to High | Switch off the fan promptly if it hums, overheats, smells burnt, or trips the breaker. |
| Fan works intermittently | Loose wiring, worn switch, overheating motor, or an internal thermal protector cycling | Note when the fan stops. Inspect accessible switches and connections for looseness, heat discoloration, or damage after power is isolated. | Repair loose connections or replace the switch. Replace the motor if it stops after warming up and restarts after cooling. | Screwdriver, flashlight, voltage tester, multimeter for qualified users | Medium to High | Discontinue use if wiring is hot, melted, discolored, or produces a burning odor. |
| Fan is noisy after cleaning | Wet components, incorrectly fitted grille, displaced blade, or loosened fasteners | Check that the grille and blade are seated correctly and that all cleaned parts are completely dry before operation. | Reinstall parts correctly, tighten fasteners, and allow moisture to evaporate. Replace any damaged blade. | Dry cloth, soft brush, screwdriver, vacuum | Low | Never spray cleaner directly into the motor, switch, or electrical enclosure. |
| Excessive moisture remains in the room | Insufficient airflow, blocked duct, undersized ducting, short operating time, or outdoor damper failure | Check airflow at the exterior outlet, inspect the duct for blockage or sharp restrictions, and confirm that the damper opens fully. | Clean the system, repair the duct route or damper, and operate the fan during moisture-producing activities and for a short period afterward. | Flashlight, vacuum, soft brush, ladder, approved duct sealant | Medium | Use a stable ladder and avoid entering inaccessible duct spaces without proper training. |
| Burning smell, smoke, or repeated breaker trips | Overheated motor, damaged wiring, short circuit, or serious electrical fault | Stop the fan immediately. Do not remove electrical parts unless the circuit is isolated and the work is performed by a qualified person. | Leave the circuit switched off and have the fan and wiring professionally inspected before reuse. | No user repair recommended; professional test equipment may be required | Professional | Treat smoke, burning odors, exposed conductors, and repeated trips as urgent electrical hazards. |
| Visible dust or grease on the grille and blades | Normal accumulation caused by airborne particles, humidity, or cooking residue | Switch off power, remove the grille if designed for removal, and inspect the blade and housing for buildup. | Vacuum loose dust, wipe washable parts with mild detergent, dry completely, and reinstall securely. | Vacuum, soft brush, mild detergent, warm water, microfiber cloth | Low | Keep water away from electrical parts and confirm that every component is dry before restoring power. |
A silent or noisy exhaust fan does not always need immediate replacement. Check the grille, switch, and visible duct opening first. Dust can restrict airflow and make the motor work harder. A rattling sound may come from a loose cover, worn bearing, or an object inside the housing. Turn off the circuit before removing the grille, even for a simple inspection.
Replace the fan when the motor overheats, stops repeatedly, or produces a sharp electrical smell. Persistent vibration also suggests worn internal parts. If the fan runs but removes little moisture, inspect the duct for blockage or poor routing. A newer, correctly sized unit may be more practical than repairing an old motor. I have seen homeowners replace the fan when the real problem was a crushed duct. That mistake costs money and leaves the moisture problem behind.
Call a qualified professional when wiring looks damaged, the breaker trips, or the fan is connected near water. Electrical faults can cause shock or fire. Professional help is also wise when access requires cutting ceilings, moving insulation, or changing the duct route. Do not ignore dark staining, peeling paint, or a musty smell. These signs may indicate hidden moisture and mold growth. A cleaning attempt may help, but it is not proof that the system is safe. Personally, I would rather pause the repair than guess around live wiring or concealed damage.