How to Create a Custom Circuit Board for Your Electronics Projects?
Creating a custom circuit board is vital for modern electronics projects. The global market for printed circuit boards (PCBs) is expected to reach $84.51 billion by 2027. This growth reflects increased demand from various sectors, including consumer electronics and automotive industries. Designing a circuit board can feel daunting at first. However, with proper guidance, it becomes an achievable task.
Many hobbyists start simple but often face challenges. Common issues include layout errors and component placement. Reflecting on these problems can lead to valuable learning experiences. A well-designed circuit board enhances functionality and reliability. Yet, beginners must recognize that mistakes are part of the learning curve.
Technical reports indicate that effective PCB design improves product lifecycle and performance. Mastering this skill can elevate any project. A custom circuit board allows for creativity and innovation. As you embark on this journey, remember that perseverance and refinement are key to success.
Understanding the Basics of Custom Circuit Board Design
Creating a custom circuit board can seem daunting at first. However, understanding the basics makes it manageable. Start with defining the purpose of your circuit. This clarity guides your design decisions. According to a recent market report by Mordor Intelligence, the PCB industry is expected to grow at a rate of 4.5% annually, reflecting an increasing interest in DIY electronics.
When designing your board, focus on schematic design first. A schematic diagram lays out the components and their connections. Tools like Fritzing or KiCad help visualize your circuit better. Remember, mistakes happen. Some engineers report spending hours troubleshooting their designs due to minor errors. It’s part of the learning process.
**Tips**:
Use color coding for different signal types. This improves clarity. Test each section before moving ahead. This reduces the risk of entire board failures. Always keep your components organized and document changes made during the design. This helps when you need to revisit your work.
Custom Circuit Board Design Progress Over Months
Choosing the Right Materials for Your Circuit Board Project
Choosing the right materials for your circuit board project is crucial. Different materials impact performance, durability, and cost. According to industry reports, FR-4 is the most popular choice. It's affordable and has good electrical insulation properties. Yet, it may not suit high-frequency applications well. In those cases, consider materials like Rogers or PTFE.
Copper thickness is another critical factor. A standard 1 oz/ft² of copper is common, but reports indicate a rise in demand for thicker copper. This reflects the need for higher current capabilities. However, thicker copper can complicate manufacturing and increase costs. Designers must balance requirements and budget.
Don’t overlook the substrate choice. Some projects require flexibility. In these instances, flexible PCBs made of polyimide are suitable. They allow for unique designs but can be challenging to source. Always review material certifications. This ensures they meet required safety and performance standards. Ignoring these details can lead to project setbacks or failures.
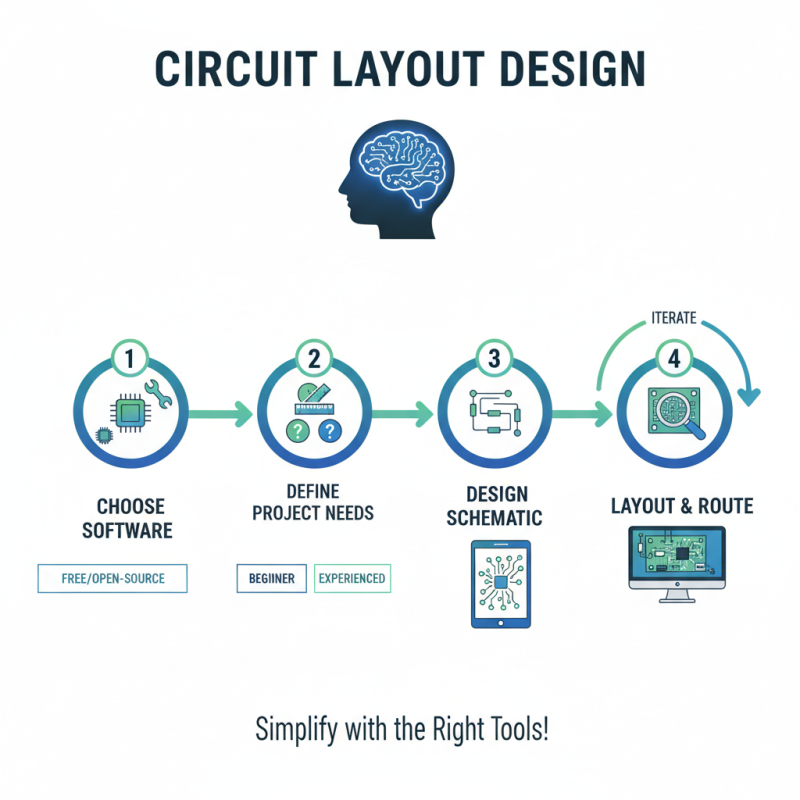
Designing the Circuit Layout with Software Tools
Designing a circuit layout can seem daunting. However, with the right software tools, the process becomes manageable. Start by choosing a tool that fits your needs. Some options are free and open-source, while others require a subscription. Consider your project requirements carefully. Are you a beginner or an experienced designer? This choice will affect your workflow.
Once you have selected the software, it's time to sketch your layout. Begin by placing your components on the workspace. Make sure to consider the size and spacing carefully. Crowded layouts can lead to errors. Connect components with traces. Remember, shorter traces usually result in better signal quality. However, don’t rush; mistakes will lead to frustrations.
As you design, take breaks to review your work. Look for potential issues, like overlapping traces or unconnected components. It’s easy to miss small details. Testing your design with simulation tools can provide valuable insights. This process can reveal flaws early on and save time later. Remember, good design often requires iterations. Embrace the imperfections; they guide your learning.
Manufacturing Options for Your Custom Circuit Board
When designing a custom circuit board, understanding manufacturing options is crucial. Different methods suit varied project needs. According to a recent industry report, printed circuit board (PCB) manufacturing has grown by 25% annually due to increased demand for electronics.
One common option is using a prototype service. This method is cost-effective for small runs. However, it may not offer the best quality. High-volume production can leverage automated processes. These can reduce costs, but the initial setup can be expensive. Consider your budget before choosing.
Tips: Keep your design simple. Complex layouts can be costly and create potential errors. Validate your design before sending it for manufacturing. Poor quality boards can lead to project delays.
Another option is DIY PCB fabrication, which allows for total control. While this gives flexibility, it also requires more skill. Many hobbyists report challenges in achieving precision with DIY methods. Experimentation is key, but be ready for failures along the way.
How to Create a Custom Circuit Board for Your Electronics Projects? - Manufacturing Options for Your Custom Circuit Board
| Manufacturing Option |
Lead Time |
Minimum Order Quantity |
Cost per Unit ($) |
Ideal For |
| Prototype Manufacturing |
1-2 weeks |
1 |
50 - 150 |
Small batches, testing |
| Mass Production |
3-4 weeks |
100+ |
10 - 30 |
Large volume projects |
| Rapid Prototyping |
3-5 days |
1 |
100 - 300 |
Fast turnaround for testing |
| Quick Turn PCB |
24-48 hours |
1 |
200 - 500 |
Time-sensitive designs |
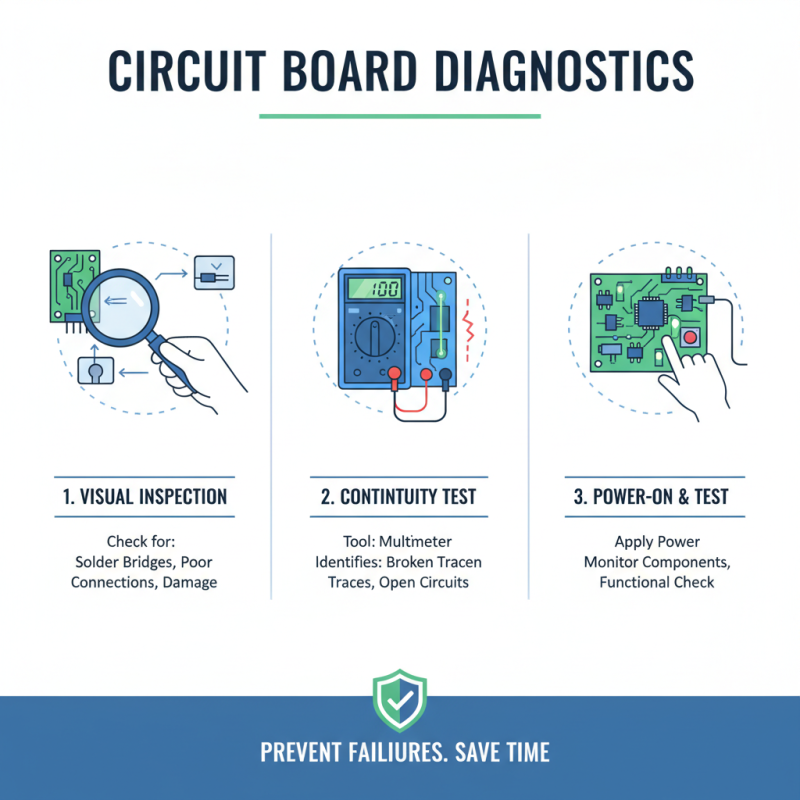
Testing and Troubleshooting Your Completed Circuit Board
Testing a circuit board can be a meticulous task. Begin by visually inspecting it for any visible damage. Look for solder bridges or poor connections. These simple errors can lead to bigger issues. Use a multimeter to check for continuity. It helps to identify broken traces or connections.
Once you power up the circuit, observe its behavior closely. Are all components functioning as expected? Unexpected heat or strange sounds might indicate problems. Take notes on any discrepancies. It’s easy to miss subtle signs, but they often point to underlying issues. If the circuit doesn’t work, revisit your design. Check your layout against the schematic. Are there any mistakes?
Troubleshooting can be frustrating. Don’t get discouraged. Sometimes, stepping away from the project helps clear your mind. After a break, come back with fresh eyes. This often leads to new insights. Proper documentation of your process can highlight patterns in your mistakes. Future projects will benefit from this knowledge. Each challenge faced is a valuable lesson.