Let Us Know How We Can Help. We Are Your Dedicated Solutions Provider.

Choosing the right Valve Cover Seals can prevent oil leaks, unpleasant odors, and expensive engine repairs. A small seal sits between the valve cover and cylinder head, yet its condition affects the entire engine bay. Oil around spark plug wells, burning smells, or damp edges often signal a sealing problem.
The best choice begins with accurate vehicle information. Confirm the engine code, model year, cover design, and gasket shape before ordering. Even similar engines may use different bolt patterns or rubber profiles. High-quality seals usually use molded rubber, silicone, or other heat-resistant materials. They should remain flexible near hot cylinder heads without becoming brittle. In professional repairs, the old seal is inspected carefully. A warped cover, damaged groove, or scratched mounting surface can defeat a perfect new gasket.
Installation quality matters just as much as product quality. Clean oil, dust, and hardened residue from both surfaces. Check the manufacturer’s tightening sequence and torque specification. Excessive force may crush the seal, while loose bolts can create uneven pressure. Some designs require small amounts of approved sealant at corners, but applying it everywhere can cause problems. Small details matter.
Not every “universal” option deserves trust. Product photos can hide differences in thickness and shape. A reliable supplier should provide material information, fitment data, and clear warranty terms. Still, no seal lasts forever. Heat cycles, poor ventilation, and neglected maintenance may shorten its life. A careful selection process reduces risk, but it cannot correct every underlying engine fault.
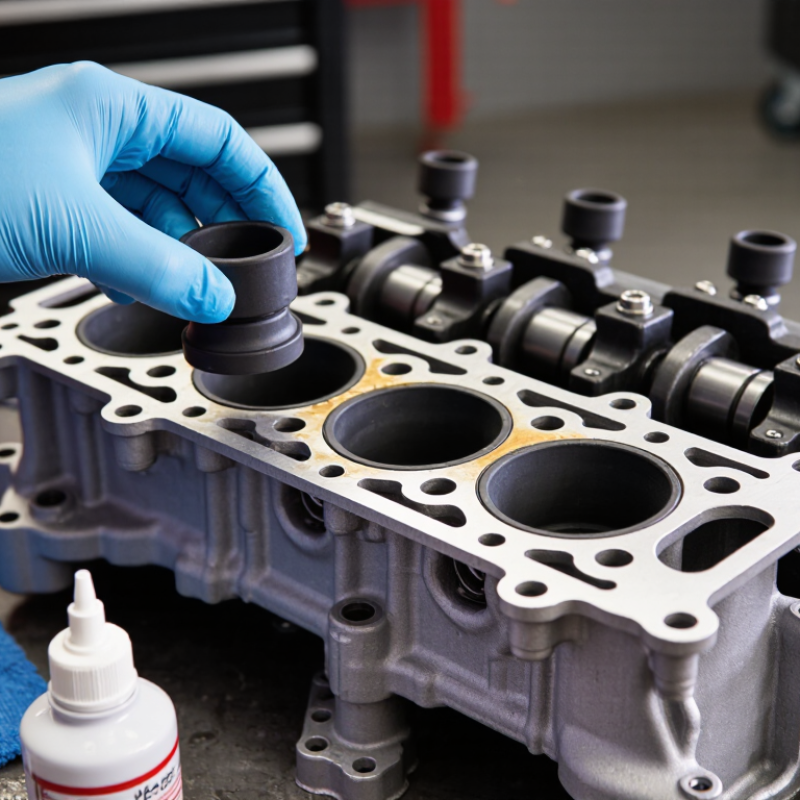
Valve cover seal requirements begin with temperature, not shape. Most engines operate near 120–150°C around the upper cylinder head, while short heat-soak events can push local surfaces higher. A 150°C rating should therefore be treated as a working condition, not a safe maximum. SAE J200 provides a recognized system for classifying elastomers by heat resistance and fluid exposure. ASTM D2000 also uses heat-aging evaluations, commonly including 70-hour exposures, to reveal hardness changes, cracking, and tensile loss.
Choose a seal compound that tolerates hot engine oil, repeated compression, and thermal cycling. Check its continuous temperature rating, compression-set data, and oil-immersion results under ASTM D471 or ISO 1817 methods. A seal may survive 150°C in dry air but soften after prolonged oil contact. That detail is easy to miss. Measure the cover groove carefully, especially near bolt holes and sharp corners. Uneven flanges can create local leakage even when the seal dimensions appear correct. Use the specified tightening sequence and avoid excessive torque; distortion can reduce sealing pressure.
In workshop testing, I would inspect the old seal for flattening, brittle edges, and polished contact marks. These clues often show whether heat, oil, or installation caused the failure. A seal that fits perfectly on paper may still leak during overnight heat soak. I would also question any product claiming a 150°C limit without published aging data. The rating sounds sufficient, but the evidence may be incomplete. Temperature margin matters. Aim for documented performance above the engine’s normal 120–150°C range.
When choosing valve cover seals, compression-set data deserves close attention. ASTM D395 measures how much a rubber specimen fails to recover after prolonged compression. A lower value usually indicates better elastic recovery and more reliable sealing pressure.
Compare materials under the same test conditions. Temperature, exposure time, specimen thickness, and test method can change the result. ASTM D395 Method B uses constant deflection and is often useful for comparing elastomer compounds. A silicone seal may retain flexibility at high temperatures, while another material may resist oil more effectively. The numbers need context.
Look beyond one impressive percentage. A seal with 12% compression set may perform differently after repeated heat cycles, bolt distortion, or contact with engine oil. Ask for test data near the temperatures your engine actually reaches. Check whether the laboratory tested the finished seal or only a basic compound sample. That distinction matters.
I would also inspect the seal after testing. Look for cracking, swelling, hardening, or permanent flattening. A neat number can still mislead. ASTM D395 provides a controlled comparison, not a complete field prediction. Installation quality matters too. Uneven tightening can create leaks, even with excellent material data. Choose the material by balancing compression recovery, temperature resistance, fluid compatibility, and the cover’s actual sealing design.
A valve cover seal should match the OEM groove, not merely the cover shape. Measure groove width, depth, corner radius, and cover flatness with precision tools. A seal that sits high may compress unevenly. One that sits low may lose contact during engine movement. SAE J200 and ASTM D200 provide recognized frameworks for comparing elastomer properties, including hardness, heat resistance, and fluid compatibility.
Engine pressure matters just as much. A restricted PCV system can push oil past an otherwise correct seal. Check crankcase pressure against the engine maker’s service specification, rather than guessing from idle behavior. The U.S. Department of Energy reports that modern engines depend heavily on controlled crankcase ventilation to reduce emissions and improve efficiency. This makes seal selection a pressure-management issue, not only a sealing issue.
Small details matter.
Clean the groove completely. Remove hardened residue from the corners. Compare the replacement seal with the removed part, but do not trust the old seal’s distorted dimensions. The 2024 Auto Care Association Factbook valued the U.S. automotive aftermarket at about $383 billion in 2023, showing how many repairs depend on reliable replacement parts. Still, market size does not guarantee fit. I have seen a seal look perfect on the bench, then leak after heat cycling because the cover was slightly warped. Torque sequence, bolt condition, and pressure testing deserve equal attention.
How to Choose the Best Valve Cover Seals?
A valve cover seal must resist more than engine oil. It also faces coolant mist, heat cycles, vibration, and pressure changes. Check whether the material has documented resistance to SAE J30-compatible oils and coolants. SAE J30 describes fluid performance requirements, but it does not guarantee every seal compound will suit every formulation. Read the seal supplier’s compatibility data carefully. Look for test results showing limited swelling, softening, cracking, and compression set after fluid exposure. These details matter during long service intervals.
In workshop inspections, I check the seal against the actual operating conditions. Note the expected temperature, oil type, coolant concentration, and contact duration. A seal that performs well in room-temperature testing may fail beside a hot cylinder head. Small dimensional changes can create a visible leak. Very small.
Nitrile compounds may suit certain oil environments, while fluorinated or silicone-based materials can offer different heat and chemical resistance. Material choice depends on the full application, not a familiar label. I once treated color as a useful quality clue; that was a weak assumption. Color cannot verify chemical stability. Request current technical sheets and SAE J30-related test evidence, then compare hardness, temperature limits, and sealing compression. If the data is incomplete, treat the seal as unverified rather than assuming compatibility.
| Seal Material | Mineral Engine Oils | Synthetic Oils | Ethylene-Glycol Coolants | Typical Continuous Temperature Range | Best-Fit Applications | Important Limitations |
|---|---|---|---|---|---|---|
| NBR Nitrile rubber | Excellent | Good | Good | −30 to +105 °C | Cost-sensitive valve covers exposed to conventional engine oil and moderate heat. | Limited resistance to ozone, weathering, and sustained high-temperature service. Performance varies with oil additives. |
| FKM Fluoroelastomer | Excellent | Excellent | Good | −20 to +200 °C | High-temperature valve covers, turbocharged engines, and applications requiring strong oil and fuel resistance. | Can have reduced low-temperature flexibility. Some formulations are unsuitable for hot-water or steam exposure. |
| ACM Polyacrylate rubber | Excellent | Good | Conditional | −20 to +150 °C | Hot engine-oil environments where dynamic sealing and oil resistance are important. | Generally weaker than EPDM in glycol-water coolant service and less flexible at low temperatures. |
| EPDM Ethylene-propylene rubber | Poor | Poor | Excellent | −50 to +150 °C | Coolant-side seals, water-glycol systems, and applications requiring excellent ozone and weather resistance. | Not suitable for continuous contact with petroleum-based engine oils, greases, or fuels. |
| VMQ Silicone rubber | Conditional | Conditional | Excellent | −60 to +200 °C | Wide-temperature sealing, static valve-cover joints, and coolant exposure when low-temperature flexibility is required. | Oil resistance is formulation-dependent; relatively high gas permeability and lower tear strength may affect durability. |
| PTFE Polytetrafluoroethylene | Excellent | Excellent | Excellent | −60 to +260 °C | Specialized static sealing where broad chemical resistance and high-temperature stability are required. | Limited elasticity and creep resistance can require carefully controlled groove design and installation. |
Choosing a valve cover seal involves more than matching its shape. Material, thickness, temperature resistance, and groove fit all matter. A seal should sit evenly without twisting or stretching. During workshop repairs, I check the cover for cracks, distortion, and old gasket residue. A clean sealing surface prevents many leaks before tightening begins. Small details matter.
Installation torque deserves equal attention. Always use the vehicle or component manufacturer’s service specifications. Torque values can change with bolt size, cover material, seal design, and fastener condition. Never copy a number from another engine. Even similar-looking covers may require different settings. Confirm the unit, tightening sequence, and number of tightening stages. Newton-metres and pound-feet are not interchangeable without accurate conversion.
Use a calibrated torque wrench, and tighten gradually in a crisscross pattern when specified. Start with light contact, then apply the listed final torque. Avoid adding extra force because the seal appears loose. Over-tightening can crush the gasket, bend the cover, or damage threads. Under-tightening can create a slow oil leak around corners. I once assumed a familiar torque value was safe; it was not. The cover warped slightly, and the repair took longer. That mistake reinforced a practical rule: verify the specification every time. After installation, inspect the perimeter and recheck for leakage under normal operating conditions, if the service procedure allows it.